A chain ring has to bear the pression of both pedals and mid-motor, therefore its teeth can wear and its shape become slightly twisted. Learn how to quickly replace it.
In our case, it’s a chainring connected to a spider on a bottom bracket with integrated cartridge bearings.
Steb-by-step chain ring removal
- The first thing to do is to slacken the chain. To do this, shift all the gears and sit on the smallest sprocket, both on the front chain ring and on the cassette. This will make it easier to remove the chain.
- If you have a chain guide, unscrew it a little and lift it up.
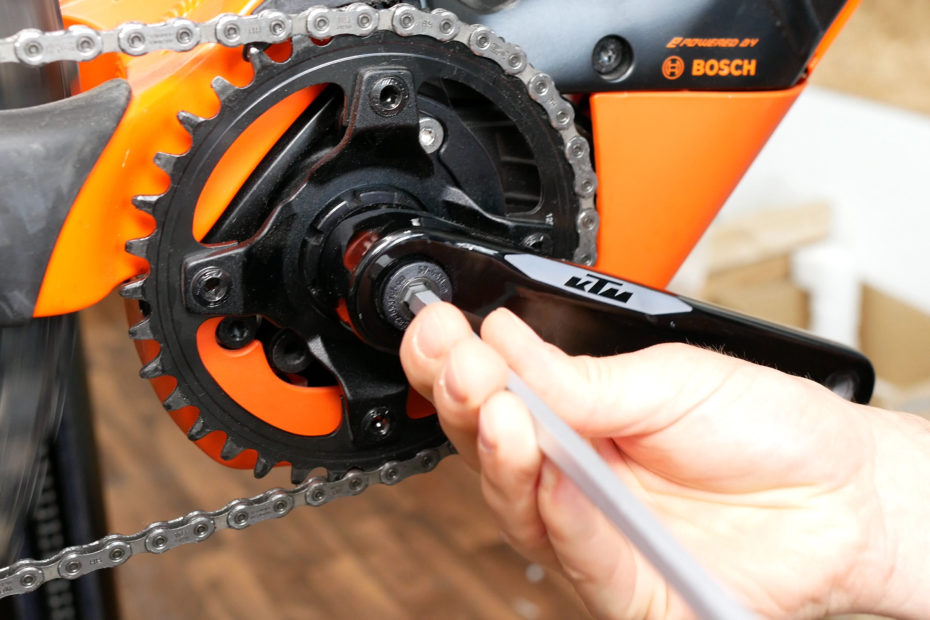
- Use an Allen wrench to loosen and remove the crank bolt.
-

- Replacing a chainring – tools

-
- The chain guide must be lifted up

-
- Removing the crank bolt

- Now use the crank puller. Screw it into the crank and tighten it with a spanner if necessary. Be careful not to damage the first thread. Make sure that no dirt gets into the thread.
- Slowly remove the crank from the bottom bracket axle. Make a note of where and in which order the seal and locking ring are fitted so that they can be replaced correctly when the new chainring is fitted.
- Notice that you may have to unscrew the lock ring turning it clockwise, unless written otherwise on the lock ring itself. In order to more comfortably loosen the rock ring, fasten the rear brake lever onto the grip with a cable binder. Plug the lock ring puller onto a torque key and unscrew the lock ring.
-
- Removing the crank

-
- Taking off the lock ring with the special tool

-
- The lock ring

- Push the chain tensioner forward and lay the chain down.
- To be able to remove the chain ring screws with an Allen key you need this kind of a back holder tool, see picture. Pay attention how your chain ring is mounted because this changes from one brand to another.
-
- Blocked rear brake

-
- Separating the old chainring from the spider

-
- Separating the old chainring from the spider – 2

Steb-by-step new chain ring mounting
- Now you can take the new chain ring and screw it onto the spider. Insert the chain ring back onto the axle without forgetting to put the seal ring on and fasten again the lock ring. At this stage you need the torque key again; normally the fastening direction of the lock ring should be indicated. With your other hand firmly hold the other crank arm on the left side of your bike.
- It’s time to mount the crank arm again. Verify that the crank columns are perfectly on the same line, aimed at opposite directions. Then insert back the crank bolt and screw it firmly.
-
- Mounting the new chainring onto the spider

-
- Tightening the lock ring

-
- Cranks must be straight in line

- Set back the chain. Turn the chain guide into the correct position and fasten it. Finally, loosen the brake.
Find more ebike tips here.