The last snow has melted, the temperatures are climbing back into double figures and the desire to cycle is reawakening. So, get your ebike out of hibernation, recharge the battery and head off on your first tour. To make sure you don’t lose all your enthusiasm right away, you might want to take a critical look at your bike beforehand. To help you, here are five important steps for a spring check of your ebike.
Step 1: Clean, pump, oil
Step 2: Ebike battery & motor
Step 3: Tighten the screws
Step 4: Lights ok?
Step 5: Check brakes and rear derailleur
Step 1: Clean, pump, oil
Maybe the dirt from the previous season still tells a story and brings back memories. But most bikes look better when they are clean. So, it’s best to take it off. Remove the battery first. It’s safer when handling with water. You can first remove coarse dirt with a soft brush. Then spray the bike with a special cleaner. Many of these products are now biodegradable. Mother Nature will be pleased if you use such a cleaner. After a short period of time, you can wipe off the dirt with a cloth. Experience has shown that microfibre cloths are most gentle on the frame.
It is better not to use a high-pressure cleaner for this step so that no water or additional dirt gets into the bearings and other parts. Special low-pressure cleaners are a good alternative – also for ebikes. For parts that are difficult to access, you can use an old toothbrush. Then let the bike dry and polish it to a shine with a soft cloth.
Gradual losses
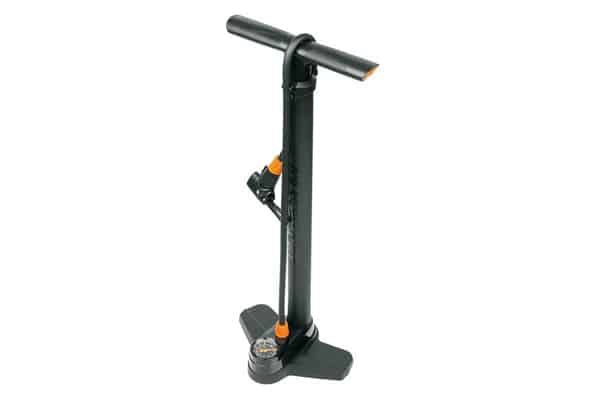
If a bicycle is not used for several weeks, its tyres will lose air pressure. After the winter break, this is an absolute must-check. The tyre manufacturer has noted on the sidewall which air pressure is considered ideal. With the help of a floor pump with an integrated air pressure gauge, you can set this pressure precisely. With the right air pressure, you also ensure that the battery does not have to compensate for any missing bar and that it reaches its optimum range.
Cleaning the chain is a rather unpopular task. Often the most dirt collects on the chain. Depending on the degree of dirt, a simple cloth through which you run the chain several times is recommended. Or you can remove old lubricant with a chain cleaner. Spray it on the chain, let it soak in and then wipe off any oil residue. Afterwards, of course, the chain needs fresh oil again. Depending on what you want to do, the oil should be suitable for wet or dry conditions. As a compromise, a universal oil will also do.
Step 2: Ebike battery & motor
Devote some extra time to the motor and the battery. After all, both are more or less the heart of your ebike.
Regarding the battery: Careful handling from the first day on is the be-all and end-all. All manufacturers provide precise instructions for correct care and maintenance. Basically, this starts with storage over the winter. The key word here is: moderate climate. Neither extremely cold nor extremely hot. And of course dry. If in doubt, keep it at a temperature that you find yourself comfortable 😉 . If you regularly check that the charge level is between 30 and 60 percent, the battery will handle even longer breaks.
Before using the battery again, you can carefully clean the battery and the connector terminals. Careful refers to the poles of the connectors in particular. A soft, dry cloth is usually the best choice. Avoid any direct contact with water. And submerging the battery in water is an absolute no-go.
Specialist workshop or expertise
With regard to the motor, your options for maintenance are understandably limited. Much falls into the hands of an appropriate specialist workshop. Usually, motors don’t need to be serviced. At least as long as everything runs smoothly. But if, for example, the motor or the cranks creak, you should take action. If you have the necessary expertise and tools, you can repair bottom bracket faults yourself with the help of appropriate service kits. Bosch in particular offers suitable products for this purpose. To protect the motor bearing, you can use them to install and grease bearing protection rings.
Step 3: Tighten the screws
Nobody likes to have a screw loose. Especially when riding at high speeds, you should regularly tighten the screws on your ebike. Start with the seat clamp and then work your way along the entire bike. It is best to use a torque spanner to ensure that the screws are correctly adjusted. You know: Easy does it. You will usually find information on the optimum torque in Newton metres on all components or in their instructions for use. The bolts of add-on parts such as the rear rack, lock, lights, etc. can also do with a little inspection. You may want to take the opportunity to secure them additionally with a screw lock.
Step 4: Lights ok?
The lighting on the ebike is of particular importance. Especially with an S-pedelec, you will be travelling much faster than cyclists without motor assistance. Good lighting can make it easier for other road users to recognise you in time and to estimate your speed. Car drivers and other road users often orientate themselves on the cadence of cyclists. According to the motto: If you pedal fast, you must be going fast. With ebikes, this can quickly be deceptive. After all, you can reach high speeds even when pedalling easily. Yes, in spring and summer it stays light longer. However, good lighting is always recommended for early morning or evening rides.
During the spring check, look for broken and damaged light cables. Loose cables can be easily fixed with a few cable ties. Some ebikes still have halogen lamps. If this is the case, check whether all lamps are really working properly and replace defective parts. You can also take this opportunity to consider switching directly to LED lighting. Modern lighting systems now shine with 1,000 lumens and more. In addition, there are lighting systems for ebikes with high and low beams, which allow you to illuminate the bends really well. This is an immense advantage, especially when riding offroad.
Step 5: Check brakes and rear derailleur
The brakes should always bring you to a safe stop. Therefore, it is important to check them before the start of the cycling season. If you have any doubts about their performance, go to a workshop. You can test a few things yourself beforehand. Is the brake pressure sufficient? Can you operate the brake lever easily? Does the brake disc scratch and squeak when you brake? If so, the brake pads are probably worn and should definitely be replaced.
According to a rule of thumb, the gears should be checked after about 1,000 kilometres at the latest. The amount of wear on the cassette, chainrings, derailleur cables and rear derailleur depends on how intensively you look after the drivetrain and the conditions under which you ride. A bicycle that is only ridden in good weather needs far less maintenance than one that is also ridden in mud and dirt. For example, if the chain jumps when shifting between two gears, or if it falls off when shifting into the highest or lowest gear, everything points to a more extensive inspection.
Do you have any other tips for the first spring check of your ebike? Then write to us in the comments.


