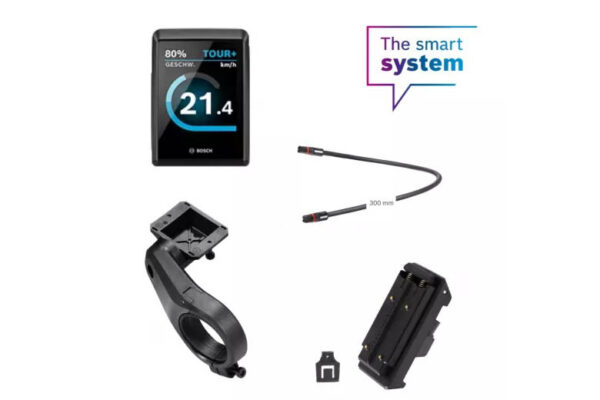
Last year, Bosch presented the Kiox 500, another display for its Smart System ebike system. Compared to the existing Bosch Kiox 300, the Kiox 500 has one decisive advantage: its screen is about 40 per cent larger. It measures 2.8 inches diagonally instead of the smaller model’s two inches. In terms of functionality, both devices are otherwise identical. If you currently operate your ebike only with the help of an LED Remote and the Bosch eBike Flow app, you can retrofit a somewhat larger display with the Kiox 500. This makes it easier for you to read the information on the display.
1. Required components and tools
2. Positioning the Bosch Kiox 500
3. Choosing the suitable display mount
4. Mounting the Bosch Kiox 500
5. Connecting to the ebike
6. Fine-tuning and checking
7. Conclusion
1. Required components and tools
To mount the Bosch Kiox 500, you will need the following components and tools, just like for mounting the Bosch Kiox 300:
- Bosch Kiox 500 display
- Single-arm mount for handlebars with a diameter of 31.8 mm to 35 mm, including adapter shell and three associated screws
- Display mount
- Display cable between ten centimetres and two metres in length
- Anti-theft device
- 3 mm Allen key
2. Positioning the Bosch Kiox 500
There are basically two options for choosing the preferred position:
- In front of the handlebars: Mount the single-arm mount on the left side of the stem, facing forward in the direction of travel. Many people like this position because, from their point of view, the display is optimally in their field of vision.
- Above the stem: Turn the single-arm mount so that it points against the direction of travel. In this position, the display can be placed above the stem at the end. In the event of a crash, it is better protected and also moves closer to you.
The decision is linked to the question of which direction the display cable outlets point. The single-arm mount’s cradle only has the necessary cut-outs on one side. Depending on the rotation of the cradle, the outlets either point in the direction of travel. This is the setting in which the display is then mounted in front of the handlebars so that the cables can be routed under the stem and into the frame. Or the cable outlets are aligned against the direction of travel. This variant is suitable for installation above the stem. Sometimes, however, routing the cables into the frame can be a little trickier.
3. Choosing the suitable display mount
To mount the Bosch Kiox 500, the corresponding display mount is inserted into the cradle of the single-arm mount. You will click the display onto this later. There are two versions of the display mount. They differ in one detail – the arrangement of the display cable outlets in relation to a tension spring. Important: the spring always points in the direction of travel. In the first version of the display mount, this coincides with the cable outlets. In the second version, the spring and outlets point in different directions. You will only be able to mount the Bosch Kiox 500 on the ebike in the desired orientation with the appropriate display mount.
4. Mounting the Bosch Kiox 500
- Attaching the single-arm mount: Install the single-arm mount on the left side of the handlebar if you want the display to point forward beyond the handlebar. Place the spacer rubber under the mount and fasten it loosely so that it can still be moved.
- Attaching the display holder: Place the display holder in the holder and screw it on tightly using a 3 mm Allen key. If you want, you can fit an anti-theft device at the same time. This prevents the display from being easily removed later.
5. Connection to the ebike
Once you have firmly screwed the display mount to the single-arm mount, you can connect it to the ebike system.
- Connection to the motor: Insert the display cable coming from the motor into the display mount. Make sure that the ebike is switched off.
- Connection to the LED Remote: Next, use the display cable included in the retrofit set to connect the Kiox 500 to the LED Remote. To do this, simply plug one end of the cable into the display mount and the other into the control unit.
6. Fine-tuning and checking
Now everything is prepared so that you can click the display into the display mount. Choose a position from which you can optimally read it while riding. To do this, slide the single-arm mount sideways to the appropriate position, turn it up or down, and also use the grid joint of the adapter tray to find the desired angle. Once you are satisfied with the setting, tighten all the corresponding screws. The next time you switch on the ebike, it should turn on automatically. If everything went as planned, the Kiox 500 will be listed as a new component in the settings in the Bosch eBike Flow app.
7. Conclusion
With the help of these instructions and the video tutorial, you are sure to succeed in retrofitting the Bosch Kiox 500. It will be even easier if you are already using a Kiox 300 or a SmartphoneGrip. All three devices use the same mounts. This means you simply remove the Kiox 300 or SmartphoneGrip from the display mount and place the Kiox 500 on top. Retrofit complete. 😉
Pictures: Elektrofahrrad24 GmbH; Bosch eBike Systems


hola, podían enviar información en español?
gracias
Hola,
por favor, echa un vistazo a nuestras páginas en español del blog.
https://www.ebike24.es/blog/
Este año hemos vuelto a trabajar en ellas más intensamente. En los próximos días también encontrarás allí las instrucciones para reequipar la Bosch Kiox 500.
Saludos, Matthias