To operate an ebike system with its Smart System, Bosch currently offers ebike manufacturers three corresponding devices: LED Remote, System Controller and Purion 200. At least one of these must be installed on a bike with such a drive. Otherwise, the exchange of information between the motor, battery and display is not guaranteed. They are interchangeable. Switching from the LED Remote to the Purion 200 could be an interesting option for many people. The associated installation is relatively simple and does not necessarily require visiting a workshop.
When the Smart System was introduced for the 2022 season, the LED Remote was the only control unit available. Ebike manufacturers installed it either individually or in combination with the Kiox 300 display. There are now two other options, the Kiox 500 and the Intuvia 100, for displaying riding data without having to use the eBike Flow app and a mobile phone inserted in the SmartphoneGrip.
Graphics instead of lines
With the Purion 200 presented this summer, however, interested parties can do without a display device altogether. The display is more or less an LED remote – except that a separate small screen replaces the LED bar. The 1.6-inch colour display provides you with information such as speed, riding time, distance, total distance, current support level, remaining battery capacity, estimated remaining range and the time on several screens. The Purion 200 is particularly popular with people who want to mount as few parts as possible on the handlebars but still want to be able to call up important information about their journeys directly from the handlebars.

Installing the Purion 200
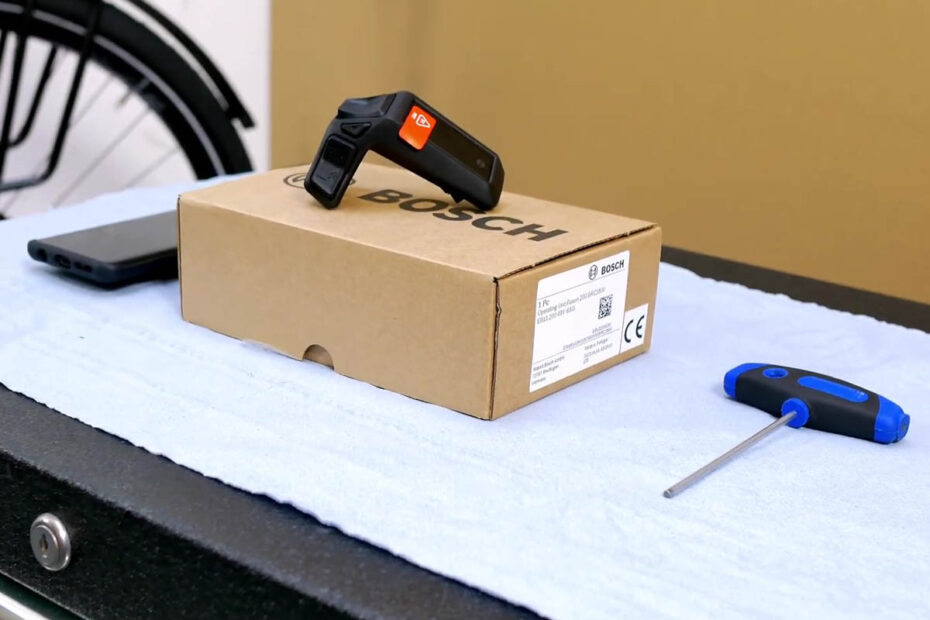
To replace the LED Remote with the Purion 200, you will need the display, a 3 mm Allen key and a smartphone with the Bosch eBike Flow app installed on it, ready to hand.

1. Removing the LED Remote
The first step is to switch off the ebike. This is always recommended as soon as an intervention on the e-drive is due. Then disconnect the cable coming from the motor from the LED Remote. You can now use the Allen key to unscrew the control unit from the handlebars. As there is only one screw to loosen, this can theoretically be done within a few seconds. However, the LED Remote bracket does not have a joint, but is a fixed ring. Consequently, it can only be pulled off.
In practice, this means that you have to remove the grips first or, in the case of fixed grips, unscrew them. The same applies to the left brake lever and any other parts on the handlebars, such as a remote control for a seat post.


2. Mounting the Purion 200
Fortunately, the Purion 200 bracket features such a joint. It can be attached directly to the place from which you removed the LED remote. However, the left side of the handlebar is completely free anyway. You can therefore simply slide it on.

At this point, it is definitely worth changing the order of the parts on the handlebars. The reason for this is the Purion 200 display, which protrudes to the right. At the same time, it is so high above the handlebars that it does not collide with the clamp of the brake lever. This means that you could place the Purion 200 directly next to the grip, while the brake lever moves further inwards on the handlebars.

Finding the right position
Now connect the loose display cable on the handlebars to the Purion 200. Do not screw the bracket on immediately afterwards. This is because the socket for the cable is located on the underside of the display. If you turn it upwards, the cable can be plugged in more easily and you avoid having to work awkwardly from below. When plugging in, pay attention to the small white markings on the plug of the cable and the socket of the display. Both must meet.

Once they have been connected correctly, you can return the Purion 200 to the position in which the display is facing upwards. Adjust the angle so that you have a good view of the display while sitting on the bike and can easily reach the buttons with your fingers at the same time. Finally, tighten the screw on the bracket hand-tight.


In this state, you can switch on the Purion 200 for the first time. To begin with, the control unit asks you to select the desired language. Immediately afterwards, it will show you the current battery charge status and you can switch back and forth between the individual screens.

3. Setting up the Purion 200 in the eBike Flow app
In the last step, you tell the eBike Flow app that a new component has now been fitted to your ebike. So far, it has saved the LED Remote. Unfortunately, this information cannot be changed individually. Therefore, remove the ebike completely from the app. To do this, go to the settings and select “My eBike”. Scroll all the way down in the menu item and select “Reset and remove”. You will then be taken to a screen where you can click on “Remove eBike”. If a large green tick appears, this has been successful and you can return to the previous page using the button at the bottom of the screen.


The system has now deleted the LED Remote from the list of components. To recognise the Purion 200, press the “Connect eBike” option in the settings. A screen will then appear asking which control unit you are using. Select the new Purion 200 here. After confirmation, the app calls up a short checklist. Follow the instructions in the app and a short time later your ebike is finally set up with the new control unit.


4. Resolve ID conflict in the ebike system
Although everything seems to have come to a successful end at this point, the impression is deceptive. In the background, the ebike drive has now saved two so-called master units – in our case, the previous LED Remote and the Purion 200 that was fitted afterwards. However, only one of these units is intended to be used. You can recognise this ID conflict by any error messages that suddenly appear on the display and simultaneously in the eBike Flow app the next time you switch on the ebike.
Unfortunately, only a specialist dealer can resolve this ID conflict by connecting your ebike to the Bosch diagnostic tool. This usually takes two minutes. And then you can actually tick the box for the conversion to the Purion 200 😉.
Pictures: Elektrofahrrad24; Bosch eBike Systems